To create a new Picture Library,click Site Actions and there, click More Options

A new Dialog window will appear.You will choose Picture Library here:
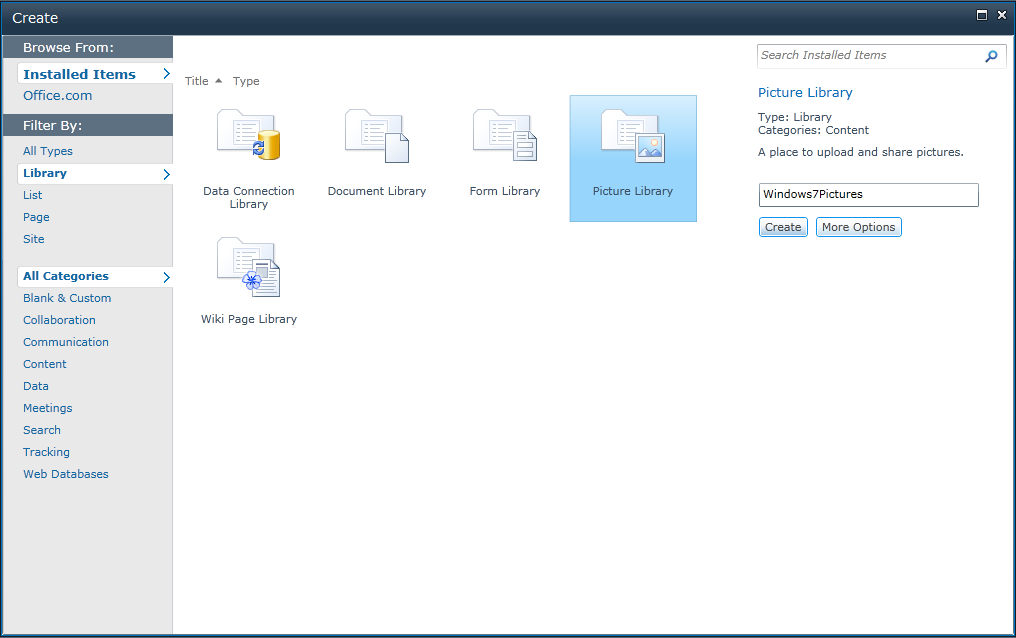
Name it Classroom Photos or Fall Photos, whatever makes sense. Example is named Windows7Pictures
and then click Create.After a couple of seconds later,your Picture Library will be ready.
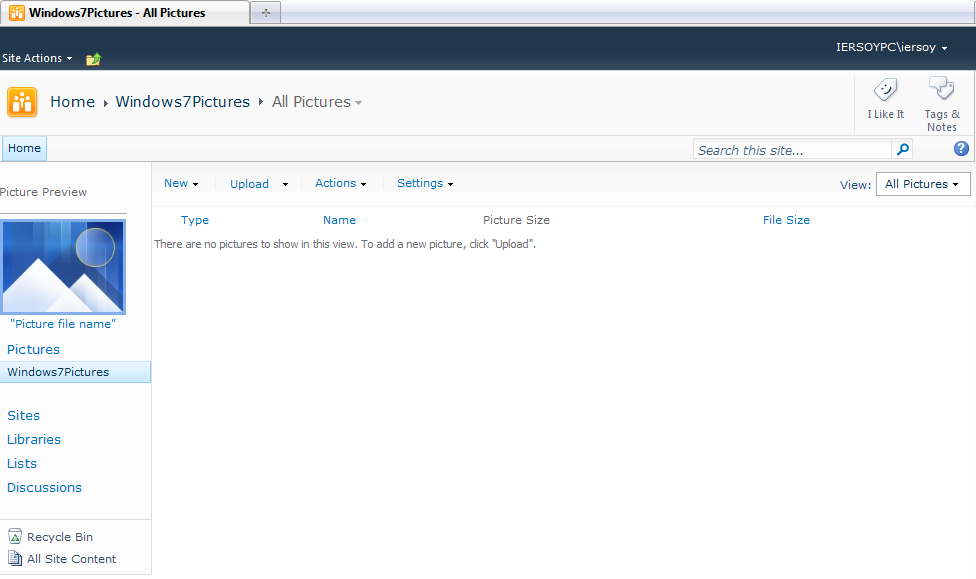
Here is your Picture Library.You can Upload files using Upload Menu:
Or you would wish to categorize the images in folders.So you can also create folders and then Upload pictures in these folders:
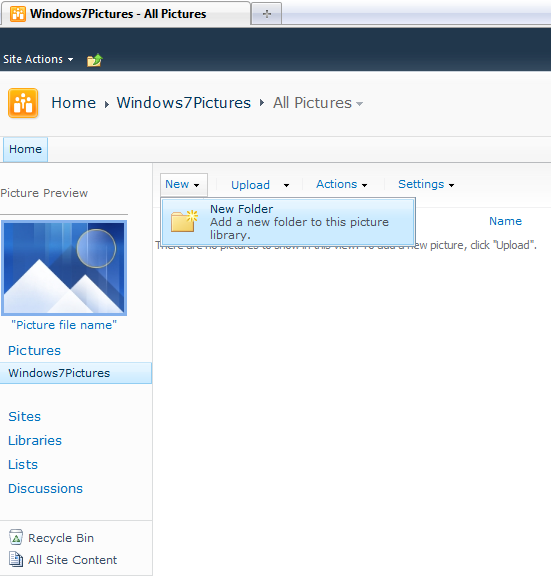
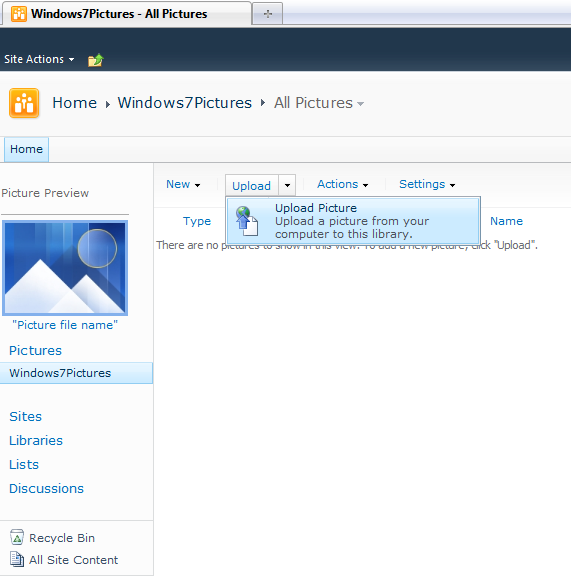
So lets add a Picture to our Library.Click Upload Menu and there click Upload Picture:
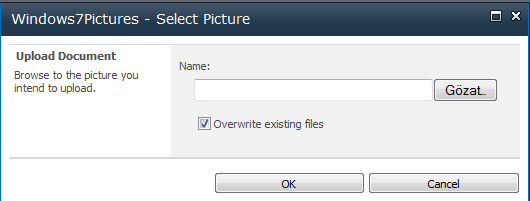
This dialog will appear requesting a file from you to upload.Choose a file in Pictures Directory in your local disk where your operating system is installed.Then Click OK:
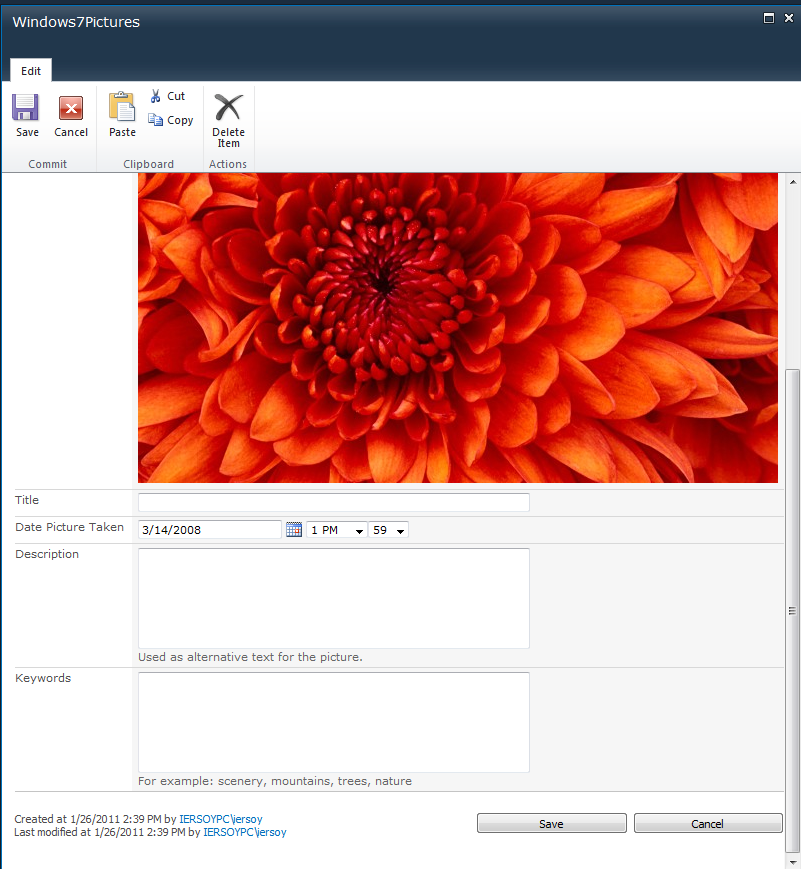
This will look familiar to you.Whenever you wish add an item to a list,whether it's a text or a file doesn't matter.You will fill this forms to give information about what you're adding in this list/library(in that case library)
Click Save and you will see the picture added in your library:

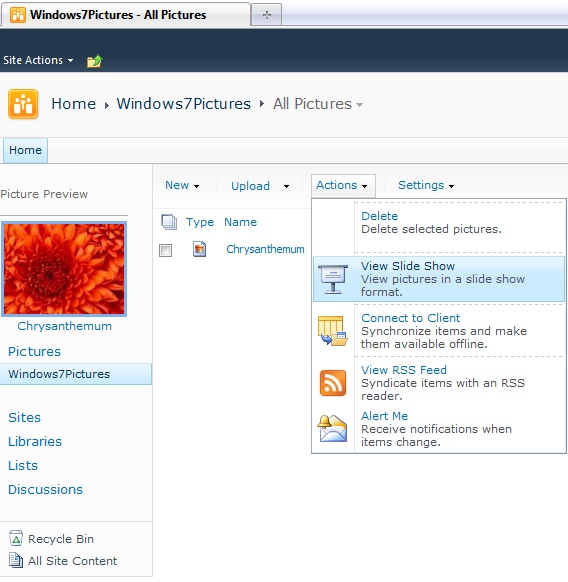
In Picture Preview you can see the Preview of the Image you added recently.
If you want to see all the pictures in SlideShow,click Actions menu and then choose "View Slide Show":
You'll see All the pictures in a new window displaying:
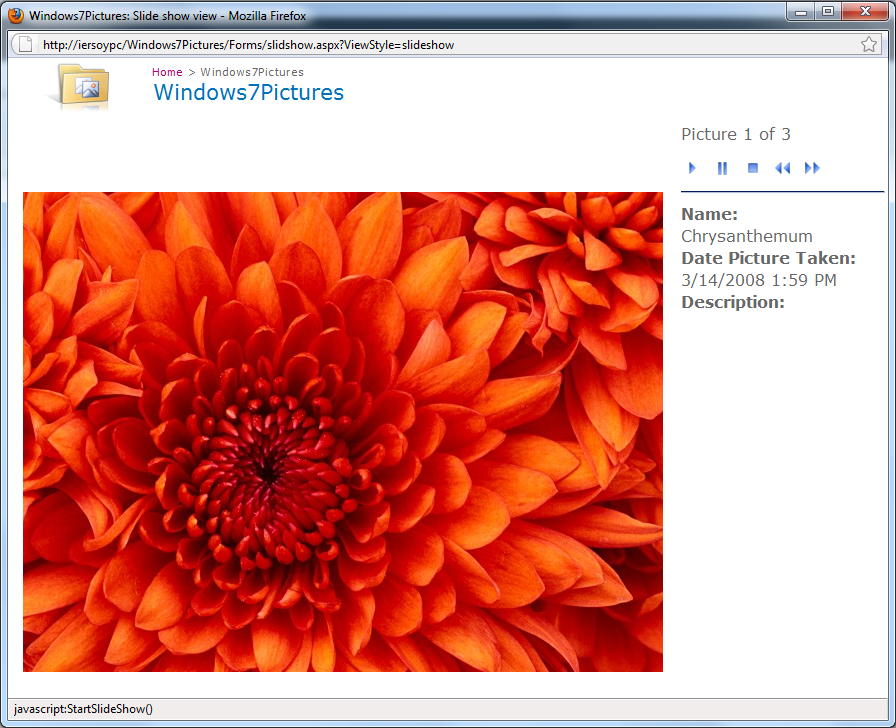
Click "Play" icon to start SlideShow.
Ok.If you want to delete this library, apply this steps:
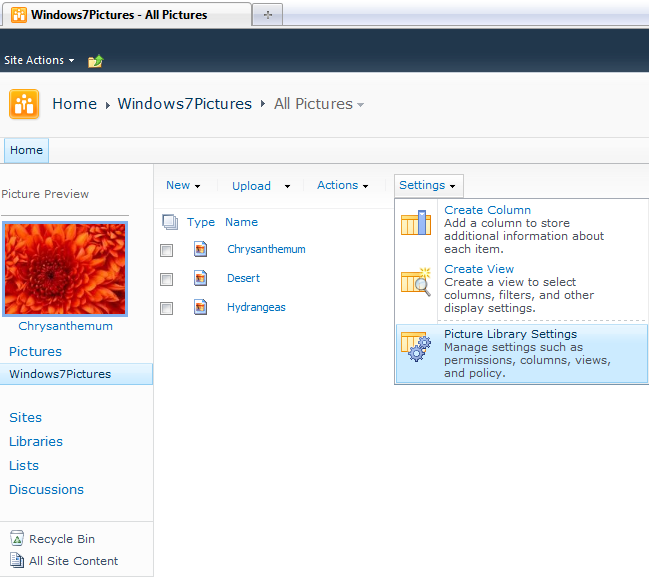
First Click Settings in Picture Library Page.There,Choose "Picture Library Settings"
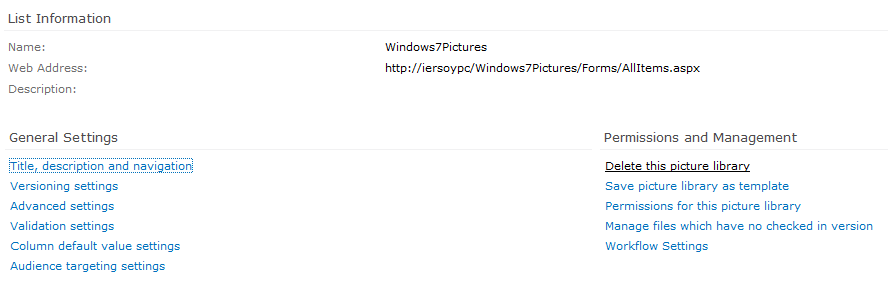
A new page will appear.There choose "Delete this picture library" to finish the process.
It will need your confirmation though.But after you clicked OK,there will be Picture Library no m